As you begin to grow cannabis seedlings, the growing method used most often will be in a grow bag or cup. This will be to ensure that they grow as fast as possible while young. As their growth continues and the edges of the leaves begin to touch the potting container’s edge, the seedlings will need to be transplanted to continue growing in a healthy manner.
The transplanting of the Cannabis Seedlings is an important step.
Before you transplant, you need to know why small containers are used to grow the seedlings. A few reasons exist as far as why a small container is used. The first centers around the fact of not knowing if the seedling would grow successfully, so the small cup would be saving you valuable resources by not planting in a huge amount of soil.
Plus, a small container does not require much space to have it sit and grow under fluorescent lighting. You will also avoid overcrowding. When you are looking for beneficial methods to grow cannabis seedlings, then the small container will provide them.
This is because a higher amount of oxygen will be obtained faster while the soil dries. Nevertheless, when you believe that you will have difficulty with transplanting, then by all means utilize a larger pot.
Below are the steps on how to transplant cannabis seedlings.
Using Paper Towel for Seed Germination
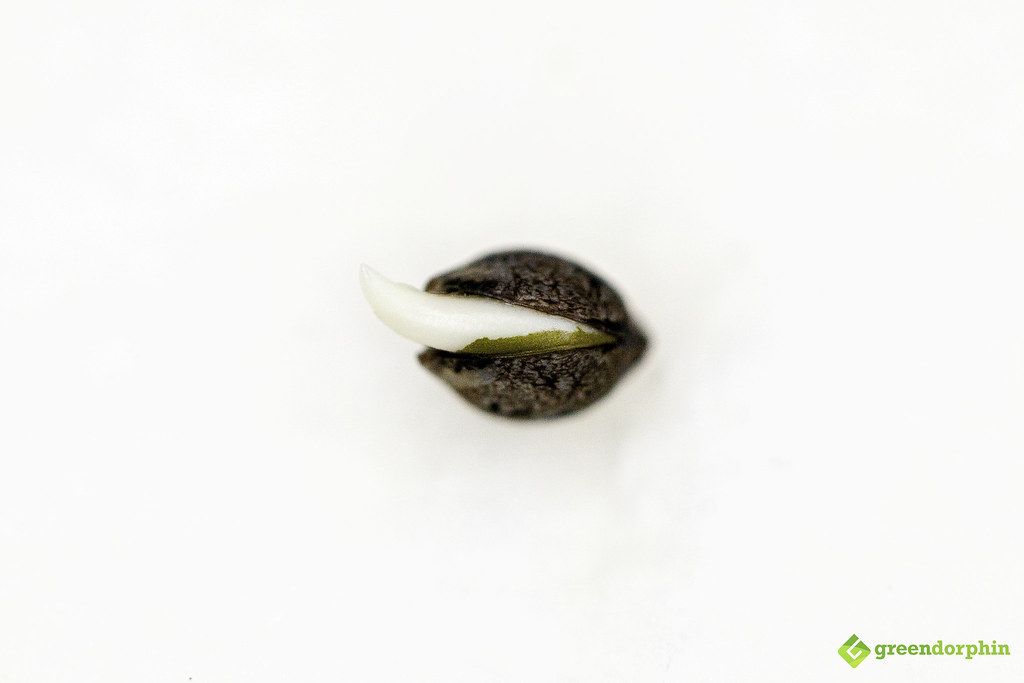
Prior to the transplanting step, the cannabis seeds are required to be germinated first. The most simple method is to use a paper towel. However, you can find several other germination methods that work too.
What you need to do first is have your paper towel wet and the seeds placed within, and then have two plates covering them to prevent drying.
Make sure that you monitor the seedlings but avoid bothering the seedlings. After germination is complete, the seeds will have cracks and tiny roots will be visible. The germination should be complete in at least a day or so, but you may experience germination taking longer if the seedlings are older.
Make sure to maintain their warmth as much as possible. If you are planning to have fast growth, then it is best to maintain a temperature of at least 75°F. You can incorporate a heat mat for the seedling, but this may not be necessary if your area’s climate is warm.
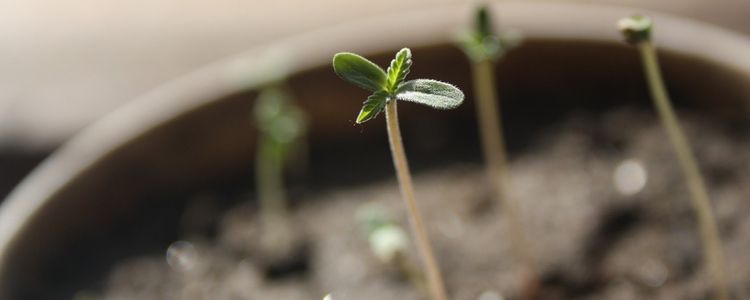
Following germination, your cup should be ready for the seedling. The seedling should be planted no deeper than 1 inch with the roots growing down. Ensure that there are enough drainage holes underneath the cup. As the seedling is in the cup, have soil covering it lightly. Within a couple of days, the seedling should sprout.
Seedling Leaves Should Touch the Cup Edge
Once the seedlings sprout, you should let their leaves grow to the cup’s edge, which will appear to happen rather quickly. After reaching the edge of the cup, transplanting should be accomplished. When you transplant now, the roots of the seedling will not get rootbound due to the decreased amount of space in the container.
When this rootbound occurs, the plant is unable to use the water and nutrients within the soil because the roots are encircling the outside of the soil, the container, which will cause the plant to become nutrient deficient and appear droopy. This is also a good time for when to transplant clones.
Use Gallon Pots For Transplanting Your Seedlings
As you have your seedlings ready for transplanting, you can just cut away the disposable cup to expose the soil and cannabis roots. Transplanting this way will allow you to save the soil and use it in the new gallon container.
By loosening the soil, you are able to lessen the stress the seedling will go through as opposed to pulling out the plant directly. Once the soil is loose, you should be able to easily remove the cup and plant it.
Preventing Shock
If you are not careful during the transplanting of your seedling, you could unknowingly cause shock when transplanting is not conducted in a timely manner. The good thing is that there are some steps that you can take in order to avoid unnecessary stress and shock.
- Conduct the transplant once the container fills with the roots but before the roots have a chance to become rootbound.
- Before transplanting, ensure that the seedlings are watered. Watering will hold the soil together while allowing the seedling to be removed easily for transplanting.
- Make sure that the soil is wet but not soaking.
- Transplanting early is always a good idea and will not affect the plant in a negative way. In fact, when transplanting early, you will avoid rootbound. Make sure to also keep the roots as undisturbed as possible, such as keeping the original soil intact.
- Give the plants at least a week in the last container prior to making the switch to their flowering phase. At the flowering phase, transplanting should be avoided to prevent shock and ultimately provide you with a weak yield.
- Incorporating a seaweed extract is a great fertilizer that will help alleviate shock symptoms, such as slow growth and drooping. Once the fertilizer is applied the cannabis should make a nice recovery pretty quickly.
- When you want to get the transplanting accomplished as fast as possible, you are able to skip many of the steps to transplanting and have your cannabis transplanted into the final container. When you decide to do this, you need to ensure that the plant is watered appropriately before it begins to show leaves and takes off with growing. You should also ensure that the plant has a sufficient amount of oxygen by having perlite added. The perlite will allow the soil to remain loosened and permit water to properly drain.
- Keep your cannabis watered properly once transplanting is accomplished.
By following the above steps, your cannabis should have no problem growing stress-free.
Transplant to a Container Bigger than the Gallon
When you notice your cannabis plant doubling in height before flowering, then it will be a good idea to have it transplanted into a larger container in order to obtain great results. When you keep the plants in a small-sized container, then they will simply not grow as well as you would like them to.
When you are planning to maintain small cannabis plants, then using the smaller containers will be beneficial as the roots will only grow as big as the space that they have.
Determining the Container Size for the Final Transplant
To be safe, you should have a minimum of 2 gallons as the final container. This is just a rough estimate because of different growth patterns, such as some growing wide instead of tall. With this in mind, you will have a great starting point for transplanting.
Let’s take a look at some container sizes that work well with different plant sizes.
- For 12 inches, the container should be at least 2 gallons
- For 24 inches, the container should be at least 4 gallons
- For 36 inches, the container should be at least 6 gallons
- For 48 inches, the container should be at least 8 gallons
- For 60 inches, the container should be at least 10 gallons
Stick to a Larger Container for Less Transplanting
Remember, you can have your container as big as you like when you do not want to do too much transplanting. This also works for times when you do not plan to be available to transplant your cannabis.
Also, you will not need to water as often when the container is bigger than normal. This is good if the plant is growing slowly, which can decrease the amount of time you spend away.
Your Cannabis Transplant Is Complete
Now that your cannabis is completely transplanted, you just need to concentrate on caring for them with fertilizer and water. In no time, you will see your plants growing exponentially as compared to the initial seedling that you started out with.
Frequently Asked Questions
Is a cup or large container to be used initially?
As you start out, it is up to you as far as what sized container you start out with. You could easily overwater when the container is big. But when the container is a cup, then the seedling is able to obtain a firm foundation that is rich in oxygen and other nutrients. You need to ensure that the watering is sufficient so that the soil does not become dry.
You only need to remember that once a leaf has touched the edge, or when slow growth occurs, then transplanting will be needed. Plus, you need to avoid shock as much as possible, so a larger container may help prevent this.
Why is it important to transplant your cannabis seedling?
Transplanting your cannabis seedling is important because it will eliminate the plant from becoming rootbound, which often occurs with small containers. When your cannabis plant becomes rootbound, its growth will also become stunted and the number of buds will be decreased. In order to avoid these issues, your plant needs to have a sufficient amount of space for them to properly grow.
When To Transplant Your Cannabis Seedlings?
In order to know when to transplant your cannabis seedlings, there are a few indications to be aware of first, such as the following:
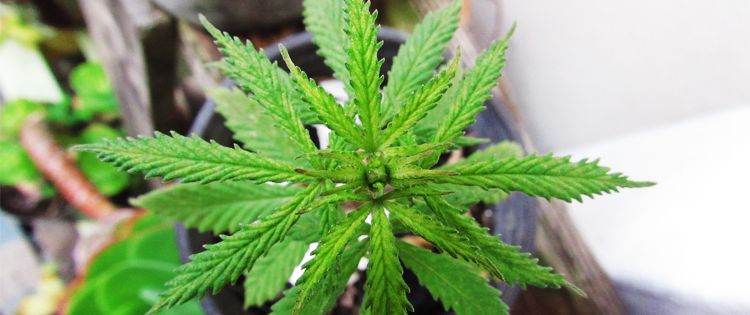
- At least 4 groups of leaves
- The roots are white, which means they are not rootbound
- The vegetative stage is ending soon. The transplanting would be a perfect time right before the end of the vegetative stage. This is also when the amount of growth is the most.
Putting it All Together
Now that you know how and when your cannabis seedling should be transplanted, you will be able to easily take care of it throughout each stage of growth. Regardless of the container size you use, your results will be a determining factor based on the container size. As you remain careful, you are able to avoid issues.
The advantage of a smaller container used to transplant weed is the huge amount of growth that you will experience. However, they will require transplanting frequently in order to keep up with the growth rate.
My previous experience was writing for large Media Companies but I am now thrilled to be writing about a niche I am most passionate about. Working with Greendorphin is a dream come true and I now join the mission in educating the masses about the miracle plant, Cannabis
- How to Use Waxmaid Honey Pen? - April 9, 2024
- How To Choose The Best Electric Dab Rig For Christmas - December 7, 2023
- Maintenance Matters: Keeping Your Glass Water Bong in Pristine Condition - October 9, 2023